
How to Program a LiftMaster Gate Keypad (Step-by-Step)
Programming a LiftMaster keypad can either be a breeze or a hassle, depending on the model and your experience level. If you encounter bumps along the way, we can help. Join us for a step-by-step guide to LiftMaster keypad programming!

Gate Keypads vs. Garage Door Keypads
LiftMaster, a subsidiary of the broader Chamberlain Group, offers keyless entry systems for a wide variety of access control systems. As such, it’s essential to ensure you’re following a guide for the correct product type.
Why This Distinction Matters
Today, we’ll walk you through the steps required to program a LiftMaster gate operator keypad. While similar, these instructions are typically different than those of garage door keypads and should not be used interchangeably. Failing to follow the proper steps can prevent communication between the keypad and operator, leading to unnecessary frustration.
It’s also important to note that there are differences between various LiftMaster models. For the best results, refer to your owner’s manual.
Before You Begin
Ready to master the art of LiftMaster keypad programming? Because most programming procedures require you to perform certain actions on different pieces of equipment — and in quick succession — it’s important to understand exactly where each component is located.
Locate the Gate Operator Controls
In most LiftMaster systems, the LEARN button is located on the gate operator’s control box or motor unit. You may need to remove the cover and look for a button labeled LEARN, LEARN XMITTER, or PROGRAM.
Don’t rely on trial and error for this step. Other buttons can affect remotes, transmitters, or other access settings, so avoid pressing unidentified controls.
Check the Keypad
Adequate power is essential for successfully programming a LiftMaster keypad. A wireless keypad relies on battery power. Ensure the batteries are properly installed and have enough juice to last. If you’re installing a brand new keypad, go ahead and use fresh batteries for optimal performance and lifespan.
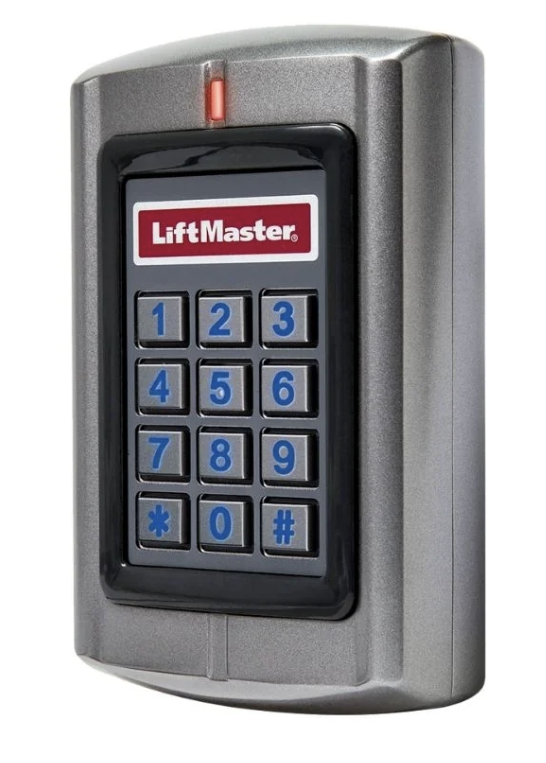
Lines for wired keypads should be secure and well-maintained. Look for any loose, frayed, or damaged wires at both the keypad and motor unit that could interfere with performance. However, do not disconnect, reconnect, or touch live wiring. If you notice anything unusual, be sure to cut power at the breaker before making any adjustments.
How to Program a New Access Code
Once you know where all components are located and ensure the keypad has a sufficient charge, you can begin programming your LiftMaster keypad. Here’s a clear, concise guide to the process:
Step-by-Step Instructions
Start by putting the gate into programming mode. While procedures may vary slightly by model number, you can typically do this by activating the LEARN button until the LED begins to blink. In some systems, this requires pressing and holding the LEARN button, while others respond only to a brief click. Additionally, many systems automatically time out after 30 seconds, so you need to move quickly.
Enter your desired access code on the keypad and confirm it using the Enter button.
Your keypad or operator should then beep, blink, or provide another indication that the process was successfully completed.
If necessary, exit the programming mode and test the new code on your LiftMaster keypad. The gate should respond accordingly.
Troubleshooting Common Programming Issues
What happens if the gate doesn’t respond to your new access code? Let’s walk through some of the most common issues people encounter when programming a LiftMaster keypad.
Keypad Beeps but Gate Doesn't Open
Sometimes, a gate may appear to accept a code by beeping normally, but then fails to activate in response. This can occur when the keypad was not properly programmed. For example:
Gate operator was not in programming mode
PIN was not successfully stored in the operating system
Keypad and operator failed to communicate correctly
Here’s how to resolve the issue:
Confirm keypad model and gate operator are compatible
Activate programming mode using manufacturer instructions for your specific model
Verify that keypad confirms new code after programming
Retest PIN
Code Accepted but Gate Doesn't Respond
If the gate doesn’t respond after performing the steps above, try to open it with an existing keypad, programmed remote, or exit device. If those also fail, the problem could be an equipment issue rather than a programming error.
In these cases, the keypad is working properly, but an issue in the gate operator, receiver, control board, or wiring is preventing activation.
To fix it, confirm power to the operator and check LED status lights for possible error codes. Follow your manufacturer’s instructions to address any indicated faults.
Wireless Interference or Battery Issues
Radio-frequency interference and battery issues are common causes of intermittent access problems. Keypads that respond intermittently may be affected by physical obstructions, such as walls, vehicles, and equipment, or interference from invisible frequencies.
Start by replacing the batteries in your keypad and verifying wired connections. Assess each unit for moisture, corrosion, and physical damage. Then move any portable objects that may distort wireless signals.
When to Call a Professional
If the troubleshooting tips above don’t resolve the issue, it’s best to call a qualified gate repair technician. Other problems that fall outside the scope of DIY projects include:
Gate doesn’t respond to any control
Faulty receiver or control board
Loose or damaged wiring
Electrical repairs
Safety device failures
Certain diagnostic codes indicated by the operator
The factory-trained technicians at Florida Gate Masters are experts in LiftMaster systems. When problems exceed simple programming errors, we’re here to help! Contact our team today to get started!